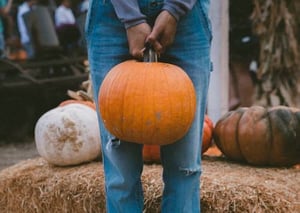
 Who doesn't love pumpkins? This is the time of year to get your carve on, which can be a lot of fun, but also a lot of work and mess for a few short weeks.
Follow these tips to end up with the best-looking and longest lasting pumpkin you've ever carved.
Look for green stems
A pumpkin's stem can tell you a lot about a pumpkin's health. The greener a pumpkin's stem, the fresher the pumpkin. If the stem is brown, the pumpkin is a bit old, and if the pumpkin has no stem at all, that's a sign that the pumpkin has been mishandled enough to cause the stem to fall off.
Also pay attention to the stem's thickness. A thick stem means that the pumpkin's walls will be thick as well, meaning the pumpkin is good and hearty.
Sketch before you carve
Drawings can be easily erased and reworked. However, the same is not true for pumpkins. Once you start carving, you can't go back, so make sure you sketch out your plan on a piece of paper before your start carving. You can also use a marker to draw the outline on the pumpkin itself. This will make carving much easier.
Spritz while you work
Pumpkins oxidize and dry out quickly, which can make them brittle and difficult to work with — if you don't keep them moist, that is. The best way to do this is to have a little spray bottle and spritz your pumpkin with water every so often.
Not only do pumpkins dry out, but they begin decomposing as soon as you cut into them. (It's nature!) So, work as quickly as you can when you're carving.
Use a variety of tools
There are more creative ways to carve a pumpkin besides using a knife to carve out holes in the shape of two eyes, a nose. and a mouth. Some of the best pumpkin carvings feature engravings on the outside of the pumpkin that don't actually go all the way through the pumpkin wall. To make detailed engravings, though, you'll need a variety of tools.
Cut a hole in the back, not the top
Much like an artery is to your body, a pumpkin's stem is to a pumpkin. If you cut the stem out of the pumpkin, you're essentially cutting off the pumpkin's life source. The same goes for the base. Instead of cutting around the stem, cut a hole in the back of the pumpkin.
Eat the seeds
Don't forget, pumpkins aren't just decorations; they're also food! Save the seeds as you remove them from the inside of the pumpkin so that you can roast them. It's easy and tasty! Just rinse them, and toss them in butter and salt before spreading them on a baking sheet. Roast the pumpkins at 300 degrees Fahrenheit for about 45 minutes or until golden brown. Later, you can eat the seeds on their own, or add them to salads or trail mix.
If you'd like to get a little more creative with your pumpkin seeds, try these pumpkin seed flavors:
- Cinnamon sugar
- Garlic parmesan
- Taco lime
- Buffalo ranch
- Smoky BBQ
- Salted caramel
- Spiced honey roasted
Keep it cool
Keeping your pumpkins cool can be a challenge in California, but there are a few tricks you can try to help. First, do not put a candle inside of your jack o'lantern. Instead, use an electric light. It will create the glow you're looking for without cooking the inside of your pumpkin.
Also, if you're really committed to keeping your pumpkin cool, you can wrap it tightly in plastic wrap and store it in the fridge at night.
Pumpkins and more!
Carved pumpkins will make a great addition to your outdoor kitchen and patio space. If you're looking for more significant and permanent updates to your outdoor kitchen, click on the banner below to get in touch with one our professional kitchen designers.

